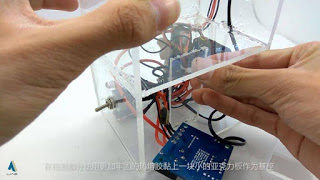
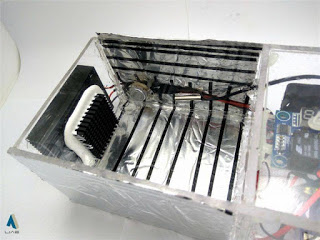
- Then you can use 705 silicone rubber to complete a part of the acrylic shell paste, pay attention to the glue layer must be thick, do not feel bad glue, and then the surface leaking trouble.
- Wait for one night and the glue layer will be fully cured.
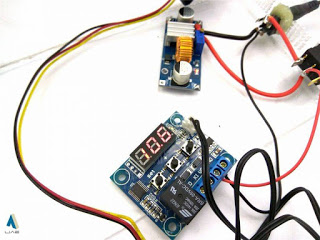
- Next, you can connect the remaining control part of the circuit. First, connect the power cable to the temperature control module to test it. Because the relay will not pick up temporarily, use the 12V direct test first (in fact, forget (/TДT)/)
- Pinch the probe of the temperature control board by hand to confirm that it can work normally. Then connect the output of the DC step-down module to the relay terminal of the temperature control board.
- Then we started to do the front panel. First, let's test the three-color LED light. It can be seen that it can emit red, green and blue lights. We use green as the power indicator, blue as the cooling, and red as the heating. When hot, the red and green light mixes to emit yellow light. When cooling, the blue-green light mixes into light blue light, and the current is limited by three 2000 ohm resistors.
- The toggle switch used to switch between hot and cold gears needs to be fastened with the supplied nut, and must be tightened. Otherwise, the slippery metal can be loosened at the back. After fixing, the six wires are led by the silicone wire. All the feet are drawn
- Then connect the negative pole of the LED to the negative pole of the power supply. The positive pole of the green pin is connected to the positive pole of the power supply. You can see that the LED has been illuminated normally.
- Connect the positive poles at both ends of the toggle switch to the relay output terminal. The negative poles at both ends are connected to the negative pole of the DC step-down module, and the heat-shrinkable tube is used to prevent short circuit.
- Connect the red and blue positive pins of the LED to the pins of the positive and negative poles in the middle of the toggle switch, so that the toggle switch can control the color of the LED, and the adjustment knob can control the middle of the road. Positive and negative poles to control the state of the refrigerant
- Then use 704 silicone rubber to glue the DC step-down module to the base of the acrylic case, the heat sink is facing the cooling fan
- Connect the wires of the cooling fins to the middle two pins of the toggle switch. Also use heat shrink tubing to prevent short circuits
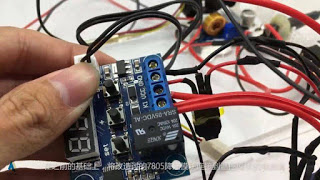
- On the previous basis, connect the modified 7805 buck module to the power supply terminal of the temperature control module.
Then we can start testing its working state and output voltage.
- Connect the cooling fan, cut the yellow speed measuring wire of the fan, and connect it to the power supply side together with the cooling fins
- Use the 705 silicone rubber adhesive sheet to hold the acrylic sheet
- After waiting for it to cure, connect the temperature protection switch and the fan above the cooling plate, and finally use a plastic cable tie to fix a part of the scattered wires.
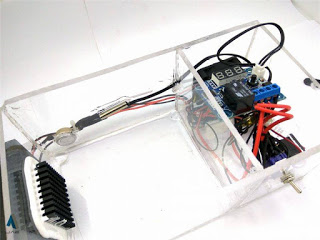
- After the scattered wires are bundled and finished, the intermediate isolation sink and the control part are glued to a piece of acrylic sheet with 705 silicone rubber.
- Use a firmer hot melt adhesive in the control section to attach a small acrylic plate as a base
- Paste our temperature control board with hot melt adhesive
- Four small foot pads made of hot melt adhesive around the control area
- then make a movable cover to cover the control part
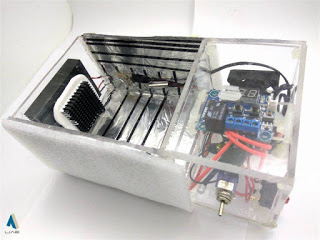
- the overall appearance at this time
- Then take out a roll of aluminum foil and stick it on the 3M tape that looks a bit ugly.
- Stick it outside the incubator
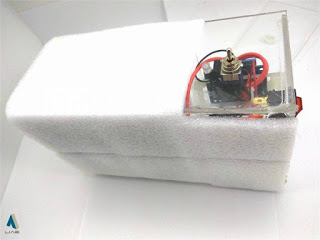
- Then use AB glue to stick a layer of insulation foam, and our work is finished.
Conclusion analysis
- Pour a cup of hot tea to enjoy the afternoon leisure time
- Modulate the voltage of the DC step-down module to 12V
-Inject 1L of cold water at a temperature of about 10 °C with room temperature.
-[size=18.6667px] adjust the temperature control module to the heating position, constant temperature 38 °C,
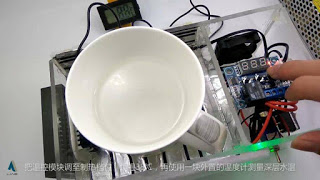
[size=18.6667px]-An external thermometer is used to measure the depth of the water. It can be seen that after 40 minutes, the temperature will stop at about 40 °C, and the temperature will be slower due to the larger volume of water. You can enjoy a day of hot tea after you come up.
- In terms of refrigeration, due to insufficient heat dissipation at the hot end of the refrigerating sheet, the cold end is only about 4 °C, and the heat dissipation is required. The effect of the small temperature difference in winter is not obvious. The cold-through test is used, and the cooling end can be stabilized at 4. Around °C
- In fact, there are still many applications for this water tank. As for how to use it, you have to use it.
Follow Me

 Englisch
  Chinesisch
  Deutsch
  Koreanisch
  Japanisch
  Farsi
Farsi  Portuguese
  Russian
  Spanisch


